반응형
Xcode로 UI를 그릴때 스토리보드로 그리거나 , 코드로 작성하는 방법이 있습니다.
코드로 UI를 작업할 때 필요없는 스토리보드를 삭제하는 방법을 공유하려고 합니다.
1. Main 스토리보드 파일 삭제
먼저 프로젝트를 생성하면 생기는 Main 스토리보드 파일을 삭제해줍니다.
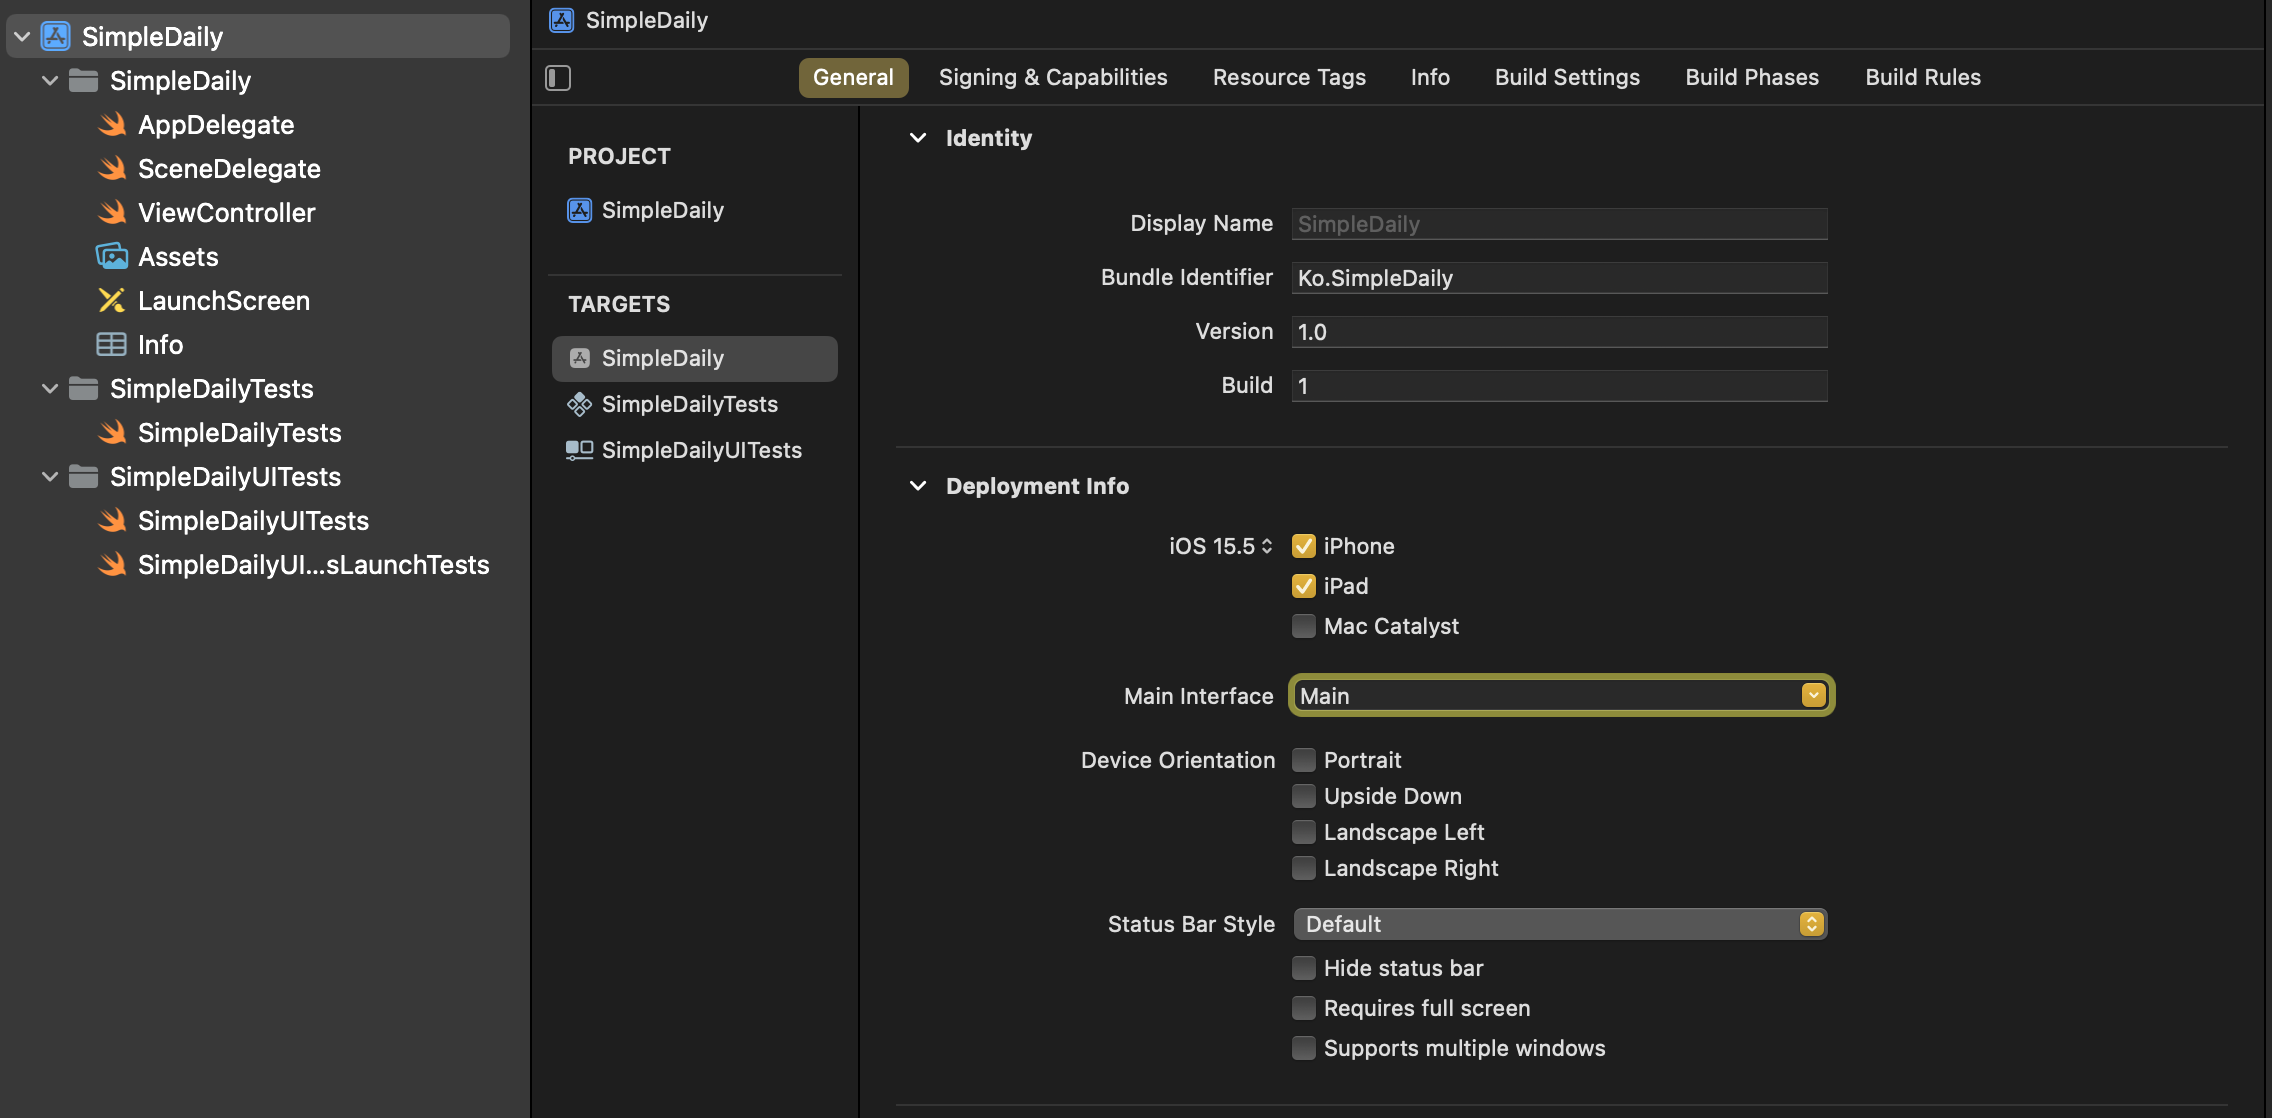
2. 프로젝트 설정
프로젝트 설정에서 Main Interface 항목에서 Main을 지우고 Enter를 쳐줍니다.
3. Info.plist 설정
아래 그림과 같이 Storyboard Name 항목을 - 버튼을 눌러서 지워줍니다.

이 과정을 다 하면 프로젝트 내부에서 스토리보드 제거하는 작업은 완료 되었습니다.
이제 앱을 실행 할 때 Default Interface를 설정해 줘야 합니다.
iOS13 이후부터는 SceneDelegate와 AppDelegate가 나눠 집니다.
iOS13 이후라면 SceneDelegate에서 Scene Lifecycle를 다루기 때문에 UI의 상태가 관련된 것을 작성하면 됩니다.
현재 저의 프로젝트는 iOS13 이후 버전이기 때문에 SceneDelegate에서 아래와같이 작성을 합니다.
class SceneDelegate: UIResponder, UIWindowSceneDelegate {

    var window: UIWindow?

    func scene(_ scene: UIScene, willConnectTo session: UISceneSession, options connectionOptions: UIScene.ConnectionOptions) {

        guard let windowScene = (scene as? UIWindowScene) else { return }
        let window = UIWindow(windowScene: windowScene)
        // 시작 ViewController를 루트 뷰컨으로 등록
        // 자신의 Main 뷰컨을 적어준다.
        window.rootViewController = ViewController()
        window.makeKeyAndVisible()
        self.window = window
    }
}
만약 iOS13 이전 이라면?
@main
class AppDelegate: UIResponder, UIApplicationDelegate {
    var window: UIWindow?

    func application(_ application: UIApplication, didFinishLaunchingWithOptions launchOptions: [UIApplication.LaunchOptionsKey: Any]?) -> Bool {

        window = UIWindow()
        window?.rootViewController = ViewController()
        window?.makeKeyAndVisible()
        return true
    }
}
다른 글들을 보니까 SceneDelegate까지 삭제하고 AppDelegate만 사용 하는 것을 보았는데 좀 더 공부를 해봐야 겠습니다.
반응형
'Swift & iOS' 카테고리의 다른 글
| [Swift & iOS] Xcode Code Sense (0) | 2023.08.29 |
|---|---|
| [Swift & iOS] 사파리에서 웹뷰 디버깅 inspect 안될때 (0) | 2023.05.27 |
| [Swift & iOS] 앱 업데이트 알림 기능 구현 관련 (1) | 2022.04.07 |
| [Swift & iOS] @discardableResult 은 무엇인가!? (0) | 2022.02.09 |
| [Swift& iOS] View reload 관련 에러 (0) | 2022.02.08 |


